

 Set up docs MCP
This is a guide on how to setup Supabase Postgres for usage in ClickPipes.
Creating a user with permissions and replication slot
Connect to your Supabase instance as an admin user and execute the following commands:
-
Create a dedicated user for ClickPipes:
CREATE USER clickpipes_user PASSWORD 'some-password'; -
Grant schema-level, read-only access to the user you created in the previous step. The following example shows permissions for the
publicschema. Repeat these commands for each schema containing tables you want to replicate:GRANT USAGE ON SCHEMA "public" TO clickpipes_user; GRANT SELECT ON ALL TABLES IN SCHEMA "public" TO clickpipes_user; ALTER DEFAULT PRIVILEGES IN SCHEMA "public" GRANT SELECT ON TABLES TO clickpipes_user; -
Grant replication privileges to the user:
ALTER USER clickpipes_user WITH REPLICATION; -
Create a publication with the tables you want to replicate. We strongly recommend only including the tables you need in the publication to avoid performance overhead.
-
To create a publication for specific tables:
CREATE PUBLICATION clickpipes FOR TABLE table_to_replicate, table_to_replicate2; -
To create a publication for all tables in a specific schema:
CREATE PUBLICATION clickpipes FOR TABLES IN SCHEMA "public";
The clickpipes publication defines the set of tables whose change events will be streamed to ClickPipes. We recommend against using FOR ALL TABLES unless you intend to replicate every table, as including unnecessary tables increases WAL traffic from Postgres to ClickPipes and reduces overall replication efficiency.
Increase max_slot_wal_keep_size
Connection details to use for Supabase
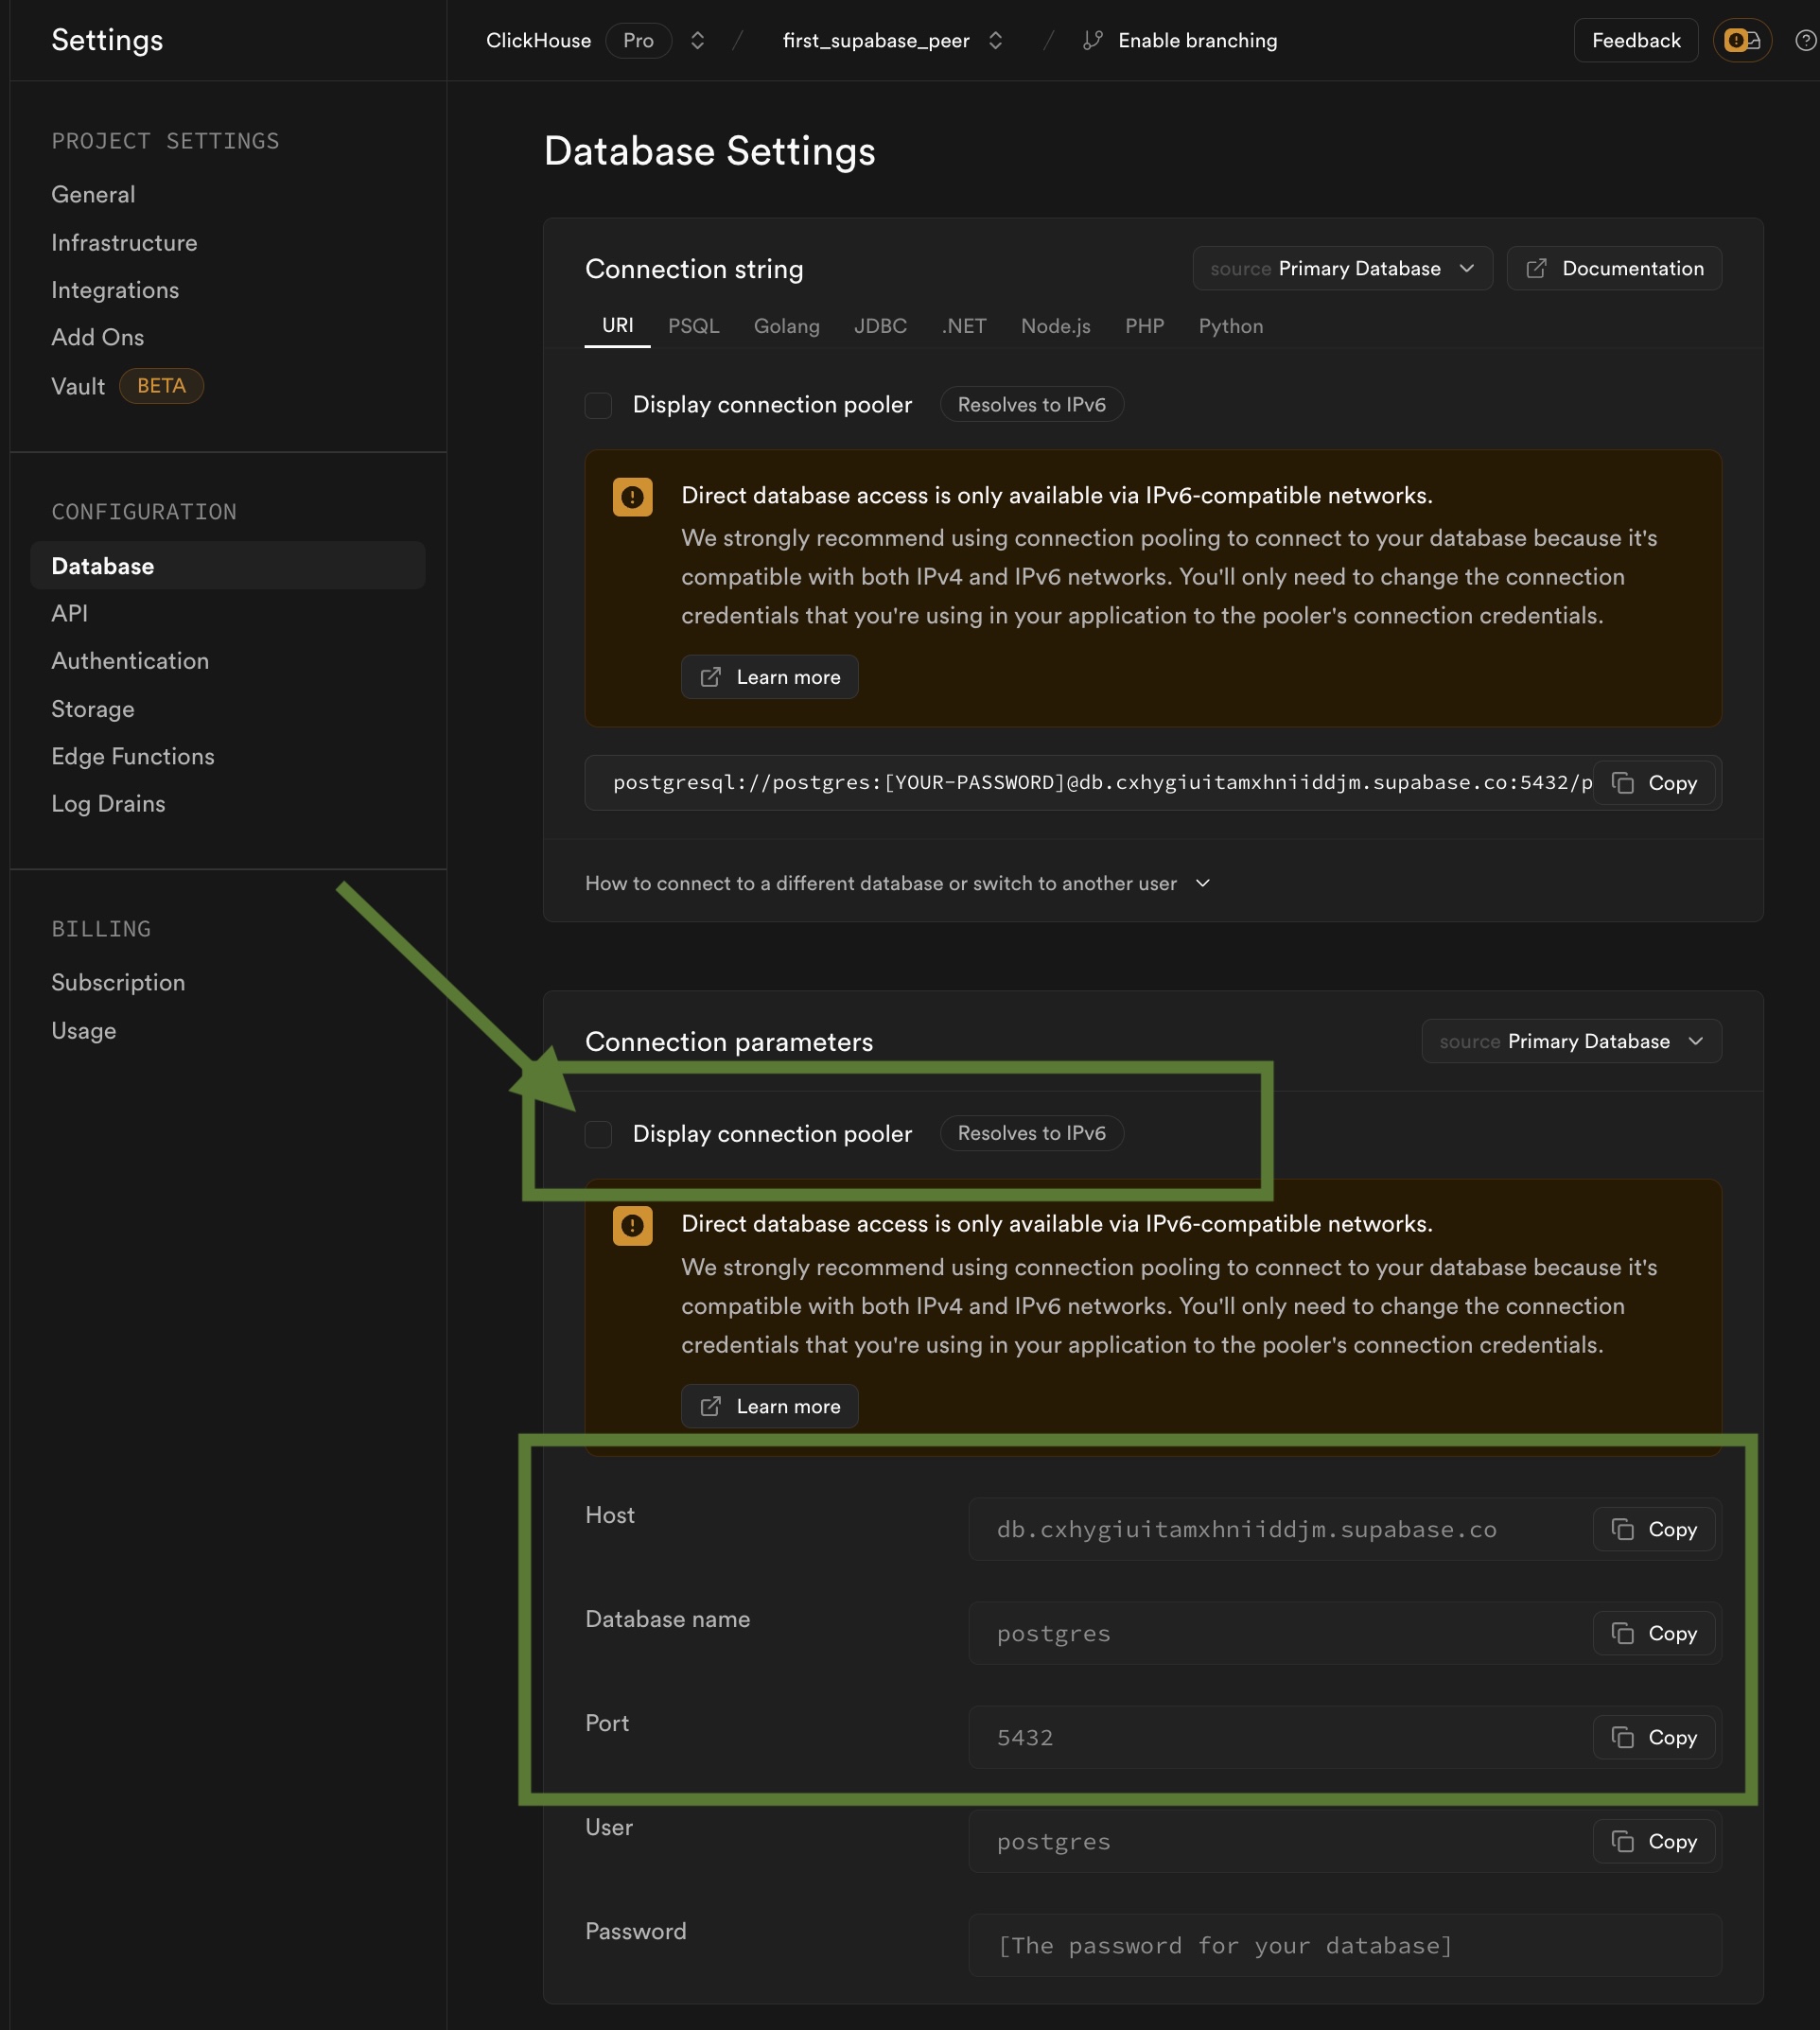
Head over to your Supabase Project’s Project Settings -> Database (under Configuration).
Important: Disable Display connection pooler on this page and head over to the Connection parameters section and note/copy the parameters.
Note on RLS
The ClickPipes Postgres user must not be restricted by RLS policies, as it can lead to missing data. You can disable RLS policies for the user by running the below command:
ALTER USER clickpipes_user BYPASSRLS;What’s next?
You can now create your ClickPipe and start ingesting data from your Postgres instance into ClickHouse Cloud. Make sure to note down the connection details you used while setting up your Postgres instance as you will need them during the ClickPipe creation process.