

 Set up docs MCP
Supported versions
To propagate data from your AlloyDB instance to ClickHouse Cloud using ClickPipes, your instance must be configured for logical replication. This is supported from AlloyDB Version 14.
Enable logical replication
To check if logical replication is enabled in your AlloyDB instance, run the following query against your primary instance:
SHOW wal_level;If the result is logical, logical replication is already enabled and you can skip to the next step. If the result is replica, you must set the alloydb.enable_pglogical and alloydb.logical_decoding flags to on in the primary instance.
To enable these flags:
-
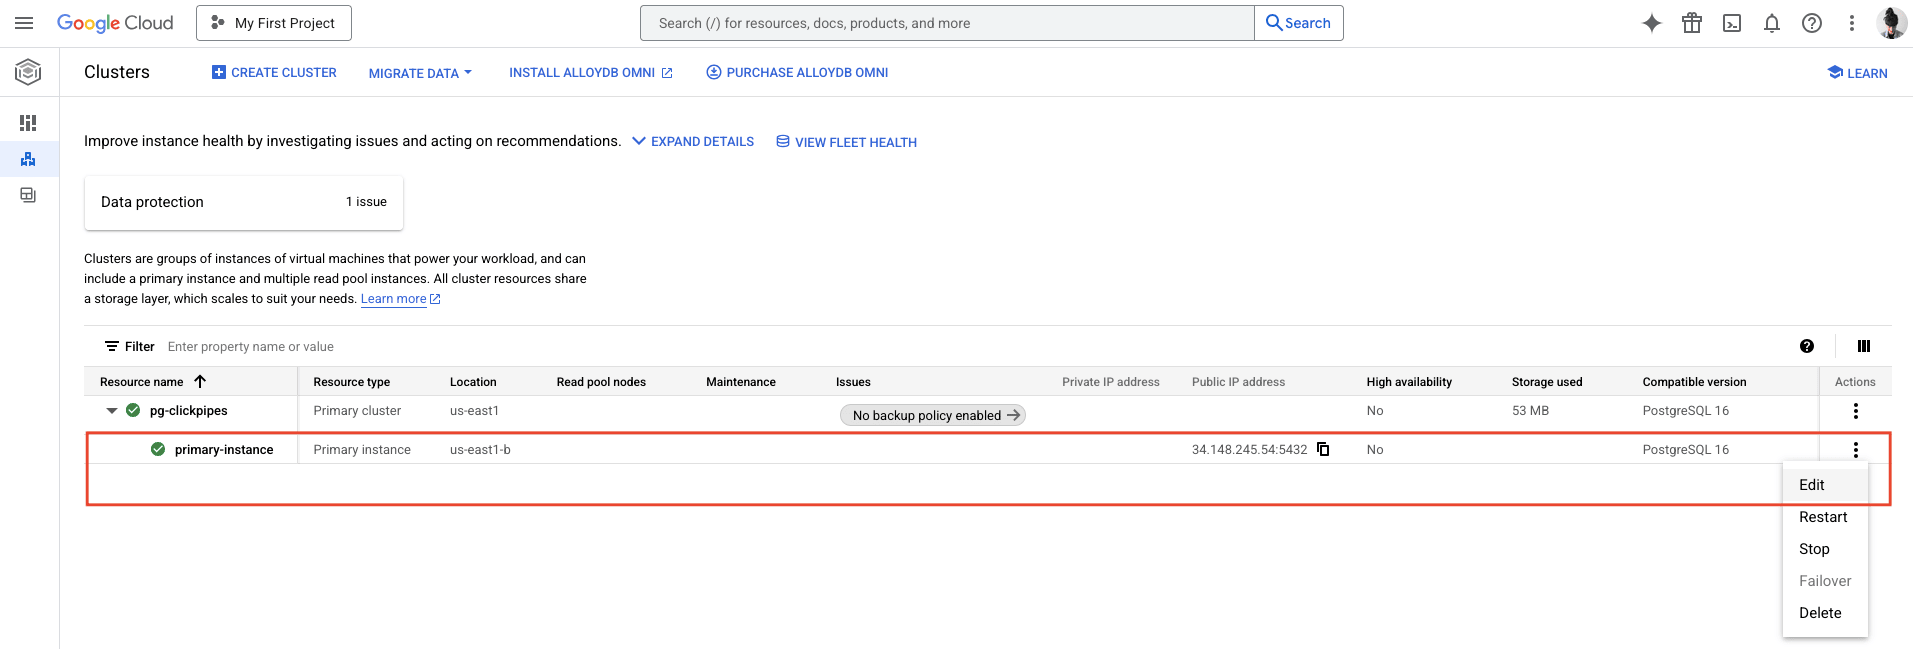
In the Google Cloud Console, navigate to the AlloyDB Clusters page. From the Actions menu for your primary instance, click Edit.
-
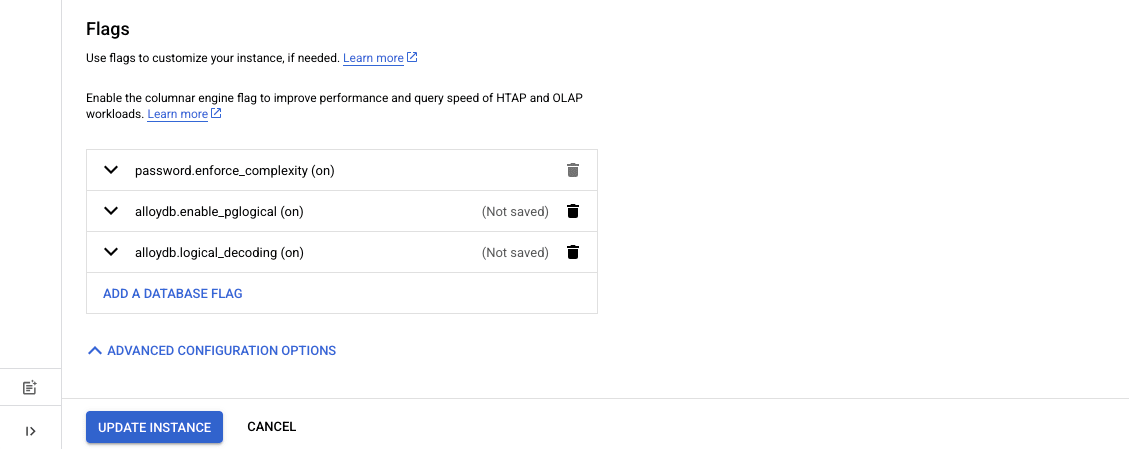
Scroll down to Advanced configuration options and expand the section. Under Flags, click Add a database flag.
- Add the
allowdb.enable_pglogicalflag and set its value toon - Add the
alloydb.logical_decodingflag and set its value toon
- Add the
-
Click Update instance to save the configuration changes. It’s important to note that this action triggers a restart of the primary instance.
-
Once the status of the instance changes from
UpdatingtoReady, run the following query against your primary instance to verify that logical replication is enabled:SHOW wal_level;The result should be
logical.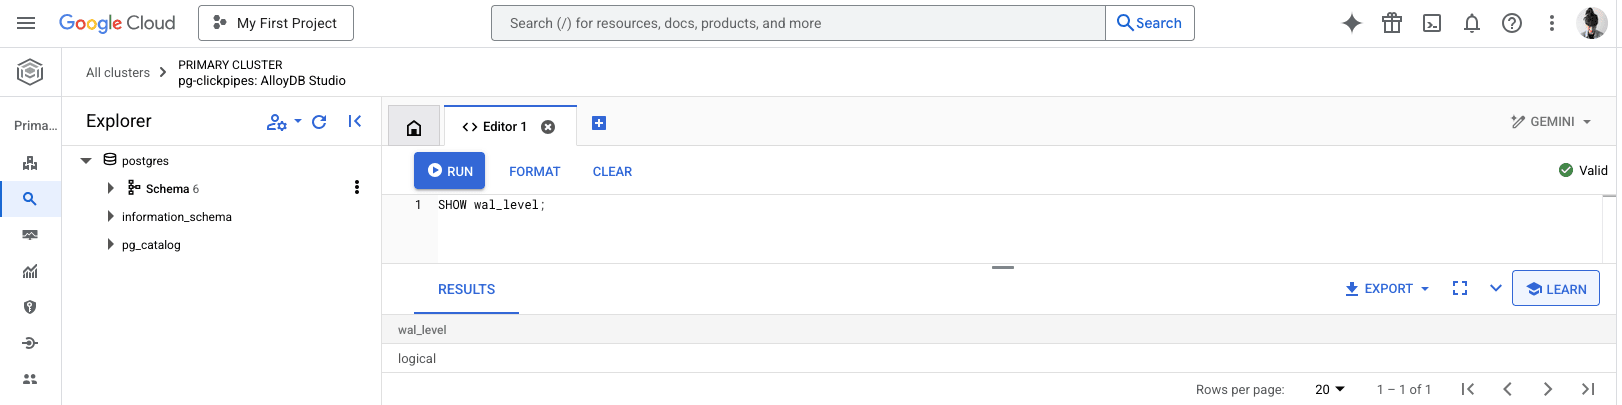
Create a ClickPipes user and manage replication permissions
Connect to your AlloyDB instance as an admin user and execute the following commands:
-
Create a dedicated user for ClickPipes:
CREATE USER clickpipes_user PASSWORD 'some-password'; -
Grant schema-level, read-only access to the user you created in the previous step. The following example shows permissions for the
publicschema. Repeat these commands for each schema containing tables you want to replicate:GRANT USAGE ON SCHEMA "public" TO clickpipes_user; GRANT SELECT ON ALL TABLES IN SCHEMA "public" TO clickpipes_user; ALTER DEFAULT PRIVILEGES IN SCHEMA "public" GRANT SELECT ON TABLES TO clickpipes_user; -
Grant replication privileges to the user:
ALTER USER clickpipes_user WITH REPLICATION; -
Create a publication with the tables you want to replicate. We strongly recommend only including the tables you need in the publication to avoid performance overhead.
-
To create a publication for specific tables:
CREATE PUBLICATION clickpipes FOR TABLE table_to_replicate, table_to_replicate2; -
To create a publication for all tables in a specific schema:
CREATE PUBLICATION clickpipes FOR TABLES IN SCHEMA "public";
The clickpipes publication defines the set of tables whose change events will be streamed to ClickPipes. We recommend against using FOR ALL TABLES unless you intend to replicate every table, as including unnecessary tables increases WAL traffic from Postgres to ClickPipes and reduces overall replication efficiency.
Configure network access
Next, choose how ClickPipes will connect to your AlloyDB instance.
For private connectivity from a ClickHouse Cloud service hosted on GCP, follow the GCP Private Service Connect guide to configure a reverse private endpoint for your AlloyDB instance.
-
In the Google Cloud Console, navigate to the AlloyDB Clusters page. Select your primary instance to open the Overview page.
-
Scroll down to Instances in your cluster and click Edit primary.
-
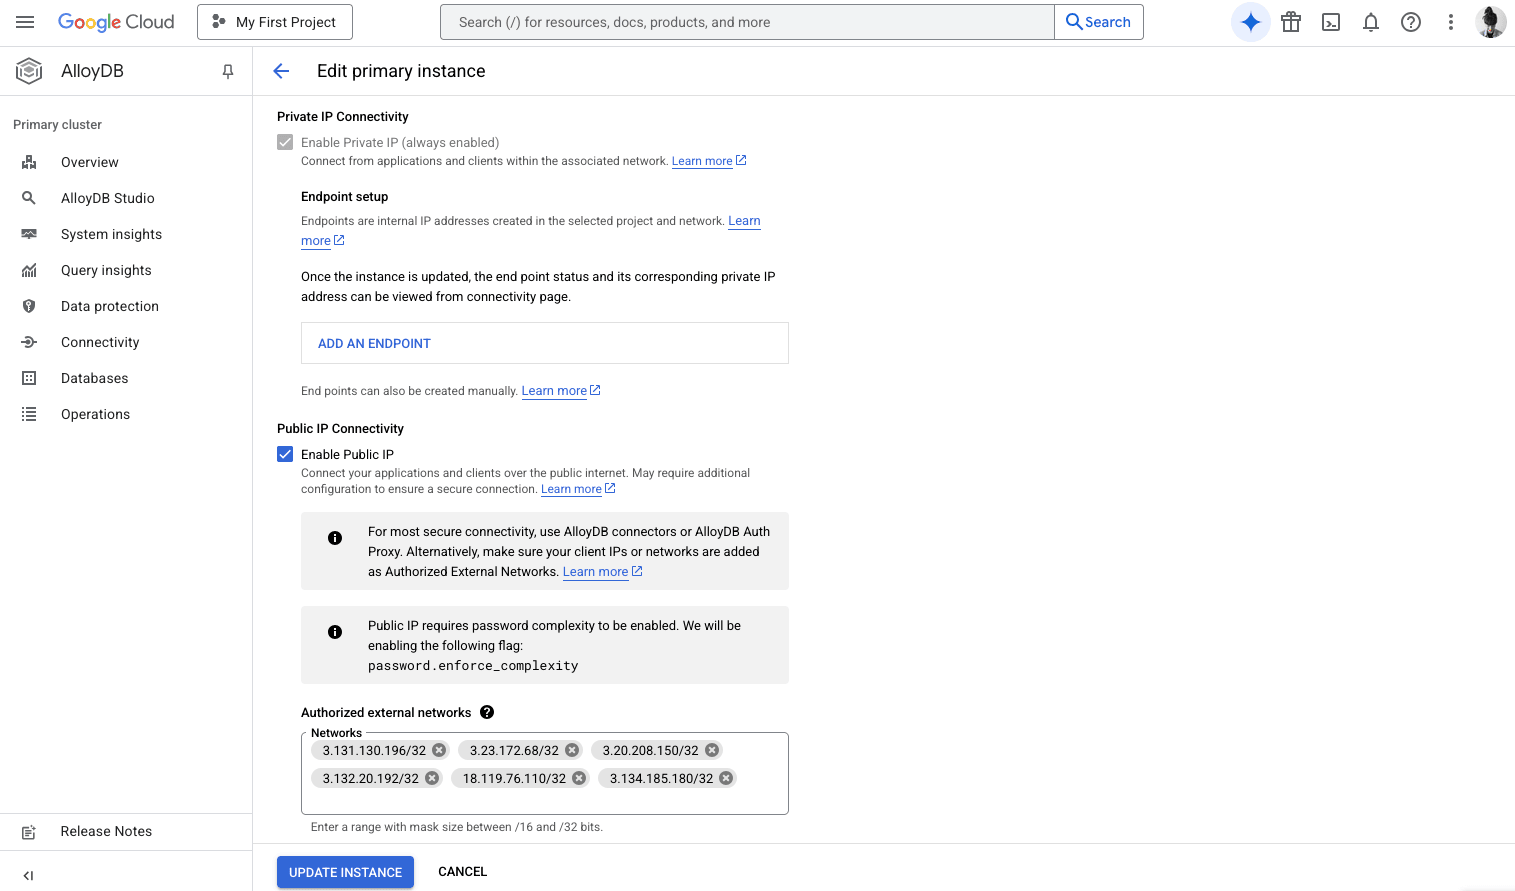
Check the Enable Public IP checkbox to allow connections to the instance over the public internet. Under Authorized external networks, enter the list of ClickPipes static IP addresses for the region your service is deployed in.
-
Under Network Security, select Require SSL Encryption (default) (if not already selected).
-
Click Update instance to save the network security configuration changes.
If you don’t allow public access to your AlloyDB instance, you must first set up an SSH bastion host to securely tunnel your connection. To set up an SSH bastion host on Google Cloud Platform:
-
Create and start a Google Compute Engine (GCE) instance following the official documentation.
- Ensure the GCE instance is in the same Virtual Private Network (VPC) as your AlloyDB instance.
- Ensure the GCE instance has a static public IP address. You’ll use this IP address when connecting ClickPipes to your SSH bastion host.
-
Update the firewall rules of the SSH bastion host to allow traffic from the list of ClickPipes static IP addresses for the region your service is deployed in.
-
Update the firewall rules of AlloyDB to allow traffic from the SSH bastion host.
What’s next?
You can now create your ClickPipe and start ingesting data from your Postgres instance into ClickHouse Cloud. Make sure to note down the connection details you used while setting up your Postgres instance as you will need them during the ClickPipe creation process.